Introduction to Salesforce Flow
A flow is the part of Salesforce Flow that collects data and performs actions in your Salesforce org or an external system. Salesforce Flow provides two types of flows: screen flows and auto launched flows.
To automate a business process that collects data from people, use a screen flow. For example, create a guided tutorial or wizard with screens.
To launch a flow internally when a record changes or when a user clicks a button, use an auto launched flow. For example, add automation to your page or app to perform an action to a record when a user clicks a button.
- In auto-layout, click Select Elements, then click
 on each element that you want to select. You can then click
  to copy all selected elements to the clipboard.
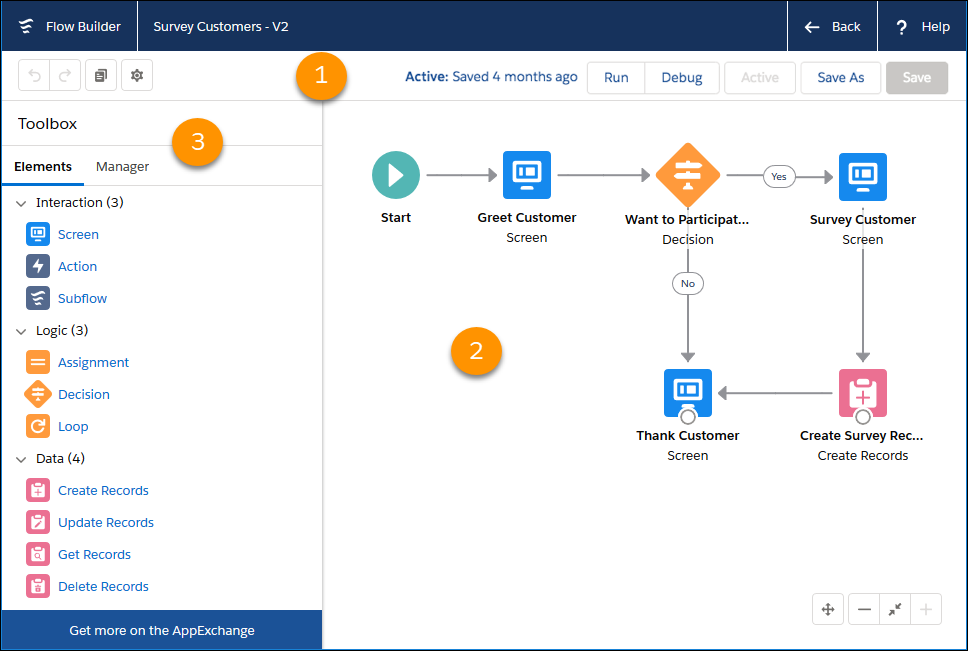
- Choose between Auto-Layout or Free-Form. Auto-Layout is the default for all new flows.
- If the flow has warnings or errors, the Show Warnings icon (
 ) or the Show Errors icon (
 ) appears. To see details, click the icon.
- To run the most recent save of the flow version that’s open, click Run. If the flow version contains Sub flow elements, the active version of its referenced flow is executed. If the referenced flow has no active version, then the Sub flow element runs the latest version of its referenced flow.
- To the left of the Run button, you can see the version’s active or inactive status and when it was last saved.
- To test the flow that’s open, click View Tests, and then click Create. Set test parameters and assertions.
- To debug the most recent save of the flow version that’s open, click Debug. Define values for input variables, roll back changes so debugging doesn’t impact data, view debug details about how the flow runs, and use those details to troubleshoot errors.
- To make the current flow version available to your users, click Activate. Only one version of each flow can be active at a time.
- To save your flow, click Save, or to save it as a new version or a new flow, click Save As.
 on a connector to add an element, or click an element to see options for that element, such as Copy Element or Delete Element.
- In free-form, use the Elements tab to add new elements such as Screen and Create Records.
- In free-form and auto-layout, use the Manager tab to create variables, stages, choices, and other resources to use in your flow. Or view a list of all elements and resources that you added.
Building Blocks of Flows
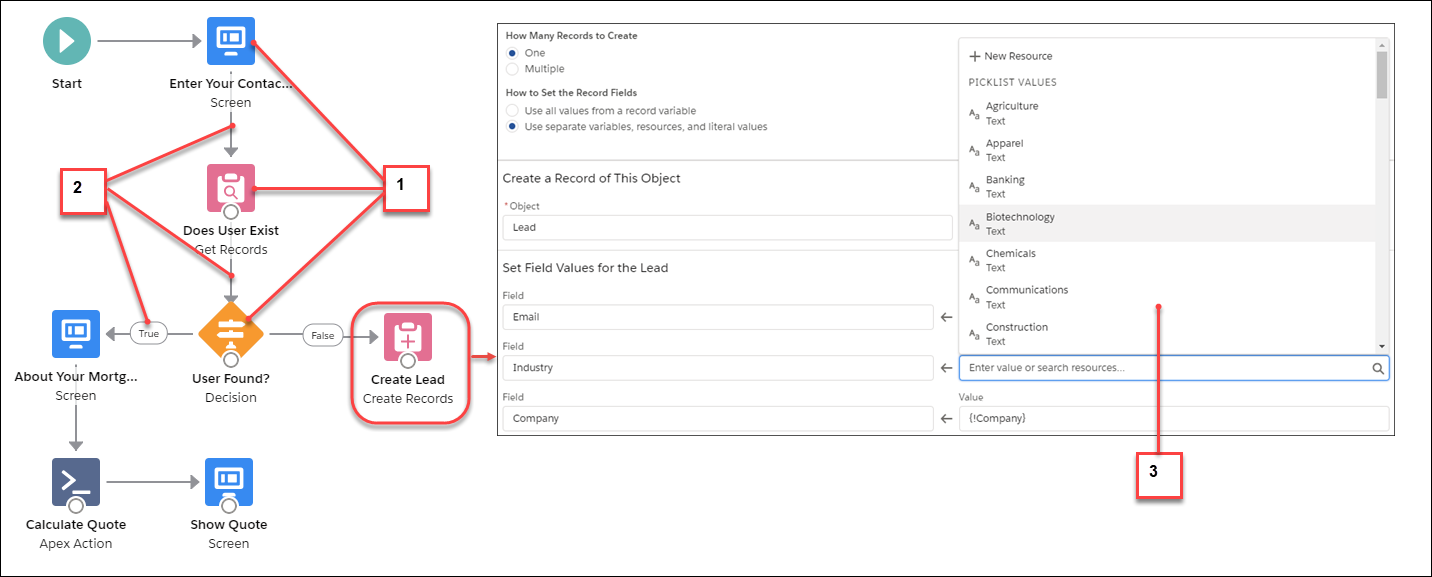
Use combinations of elements, connectors, and resources to build flows.
- Each element (1) represents an action that the flow can execute. Examples include reading or writing Salesforce data, displaying information to and collecting data from flow users, executing logic, or manipulating data.
- Each connector (2) defines an available path that the flow can take at run time.
- Each resource (3) represents a value that you can reference throughout the flow.


Follow Us