
How to Send WhatsApp Message Using WhatsApp Business Platform API In LWC
.png "How to Send WhatsApp Message Using WhatsApp Business Platform API In LWC")
In this blog, you will learn how you can integrate WhatsApp Business Platform API and send WhatsApp Message using lightning web component in salesforce.
Follow Below Steps for WhatsApp Business Platform API Integration
1) Login to https://developers.facebook.com using your Facebook Credentials.

2) Click on My Apps Menu

3) Click on Create App Button

4) Select App Type as Business and Click Next

5) Enter App Name, Email Address and Click on Create App.

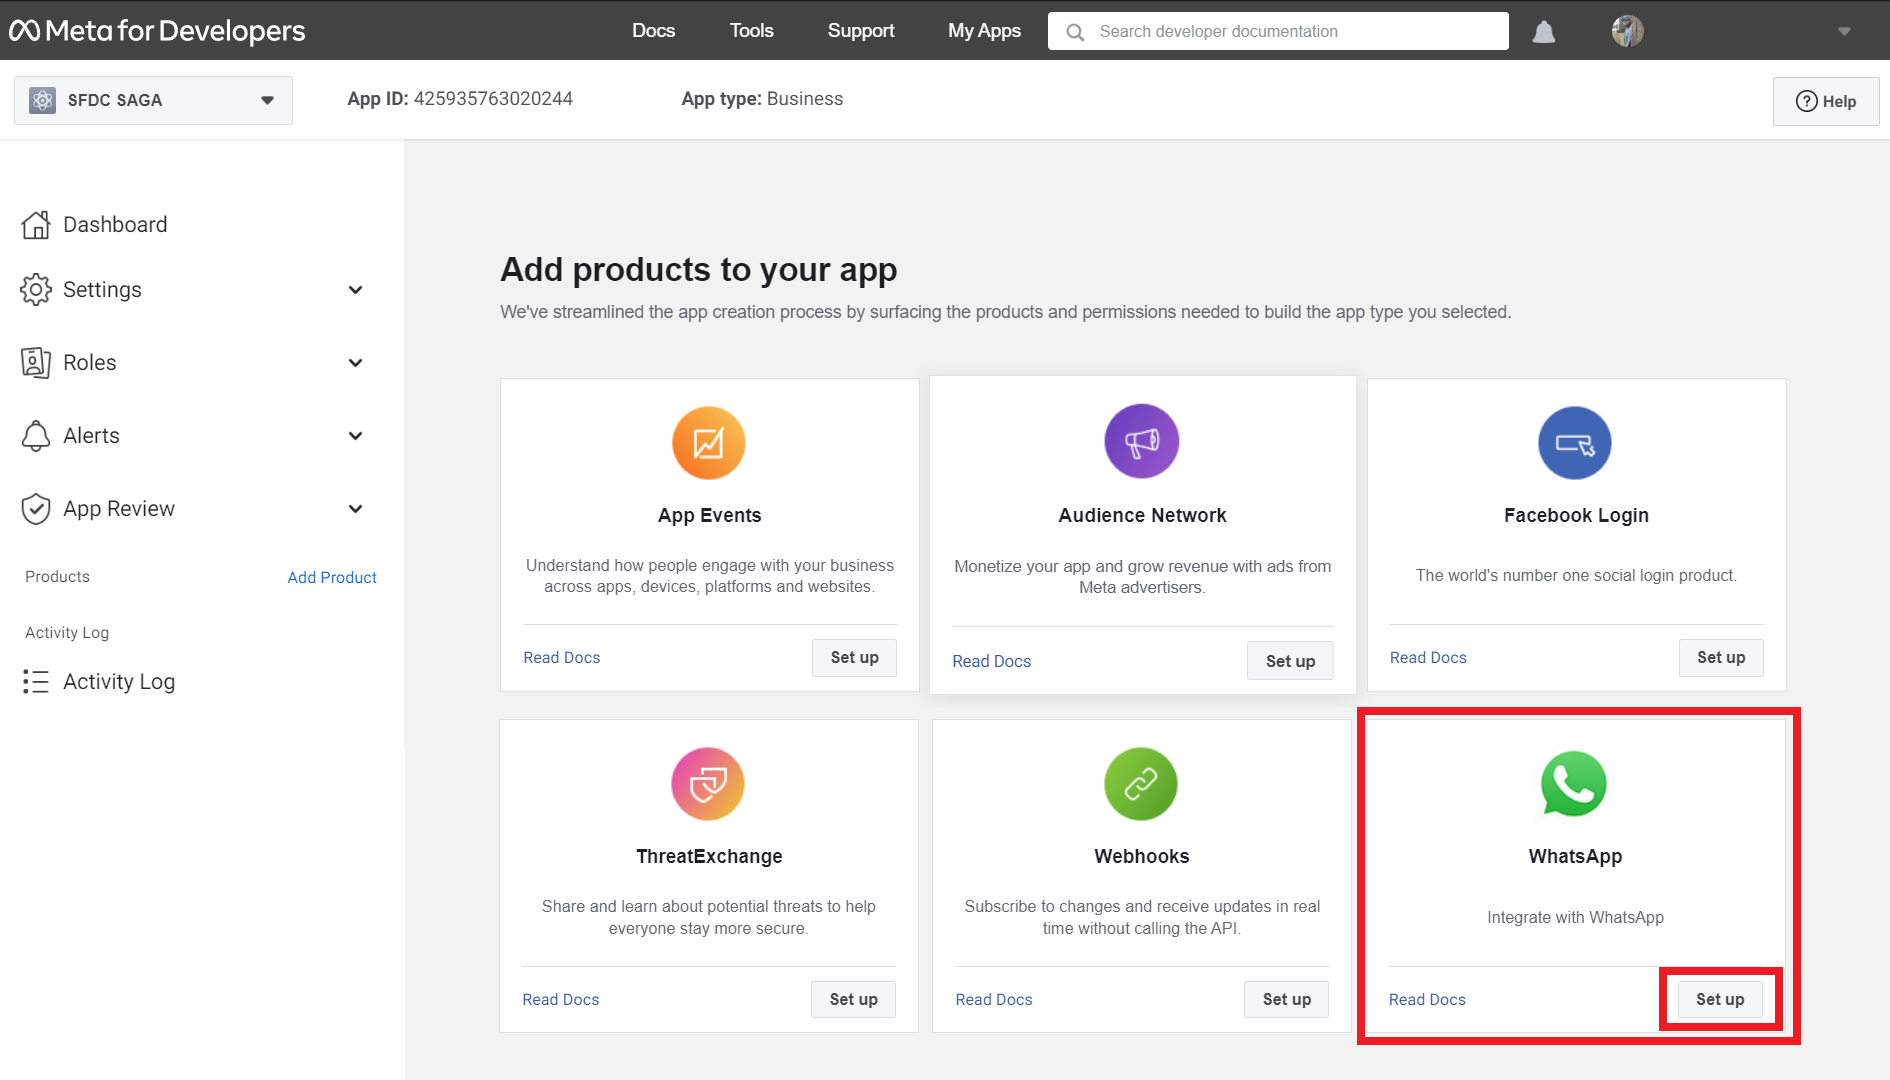
6) From Add Products to your page, select WhatsApp and click on Setup Button.
7) Create a Meta Business Account from Whatsapp Busniess Platform API Setup Screen and click on continue button.

8) Once the setup is completed, you will be redirected to API details screen, where you need to add your verify your phone number to test the functionality.
Note:
- API Access Token Expires in 24 Hours.
- You can add and verify only up to 5 recipient phone numbers.

9) Once you add phone number to verify the recipient phone number, Facebook Business User will send you a Facebook confirmation code. Use this code to verify the number. On confirmation. This will show as number has been verified.
10) Click on send message button. You would have received a hello world message from the test number which has been assigned to your connected app.
Follow Below Steps for Setting up WhatsApp Business Platform API Integration in Salesforce
- Go to Setup
- Search Remote Site Settings
- Add this URL https://graph.facebook.com and Save to perform callout from Salesforce to Whatsapp API.
Follow Below Steps for Setting up Lightning web component in account record page in Salesforce
1) Open Visual Studio
2) Download the source code from the below Github Repo Link and add it to your project folder.
Source Code - GitHub Repo Link
3) Replace Access Key and Phone Number ID Fields highlighted in green from screenshot 8 in LWC JavaScript file.
4) Push your changes to your Salesforce Org.
5) Go to any Account record in your salesforce org.
6) Add the WhatsApp lightning web component on the Account Record Page.
7) Activate and Save.
8) That's It, Done.
Important Note : Replace Access Key and Phone Number ID. Fields highlighted in Green from Screenshot 8 in LWC JavaScript File.
Demo
Follow Us


Posted By :
 Date :
 Date :
I am getting Final Response is failed. Please let me know where i am doing mistake
ReplyDeletecan you please confirm, you have followed below steps mentioned?
ReplyDelete1) have you created remote site settings
2) have you updated the access key and phone number id in the lightning component Javascript file.
Yes, updated both access key and Phone number id. Also added remote site settings. When i debug I am getting responseCode 400 instead of 200. I did check all syntax and parameter passing but i am not aware where i did mistake
ReplyDeleteCan you check if all the parameters you are passing contains data and not null. this might be the issue. also have you verified your whatsapp account with valid phone number in facebook developers portal?
ReplyDeleteOkay Sure
ReplyDeleteThank You
ReplyDeleteIm getting error as Recipient phone number not in allowed list: Add recipient phone number to recipient list and try again.
ReplyDeleteSeems like you have missing to verified your phone number. as mentioned in step 9. Please validate once.
DeleteGreat article. phone number always need to be verified before sending the message?
ReplyDelete